Painting your kitchen cabinets is one of the most cost-effective ways to transform your kitchen without the expense of a full renovation. What could cost $15,000-30,000 for new cabinets can be accomplished for under $500 with the right approach and a weekend’s worth of work.
The key to professional-looking results lies in proper preparation and using the right techniques. While it’s definitely a project that requires patience and attention to detail, the dramatic transformation you’ll achieve makes every hour of prep work worthwhile.
Is Painting Your Cabinets Worth It?
Before diving into the how-to, let’s address the big question: is this project right for your kitchen? Cabinet painting works best when your existing boxes are structurally sound and the door style fits your desired aesthetic.
If your cabinet boxes are solid and your doors aren’t heavily damaged or an outdated style you dislike, painting can give you a completely new look for a fraction of replacement cost. However, if doors are warped, boxes are falling apart, or you want to change the door style entirely, replacement might be your better option.
Choosing the Right Paint and Finish
The paint you choose will make or break this project. Kitchen cabinets face daily wear from grease, moisture, and constant handling, so standard wall paint simply won’t hold up.
Alkyd (oil-based) paint provides the most durable finish and levels beautifully for a smooth appearance. However, it takes longer to dry and requires mineral spirits for cleanup. High-quality acrylic paint designed for cabinets offers easier cleanup and faster drying while still providing excellent durability.
For finish, semi-gloss or satin work best in kitchens. Semi-gloss is more durable and easier to clean, while satin offers a more subtle sheen that hides imperfections better.
Essential Tools and Materials
Don’t try to cut corners on tools for this project. Quality equipment will save you time and frustration while delivering better results.
For preparation: Drop cloths, screwdrivers, drill with bits, wood filler, 120 and 220-grit sandpaper, tack cloth, degreasing cleaner, and painter’s tape.
For painting: High-quality angled brush (2.5-inch works well), foam roller with covers, small artist brushes for detail work, paint tray, and plenty of stir sticks.
For setup: Sawhorses, plywood or cardboard for work surfaces, and good lighting. You’ll be doing detailed work, so proper lighting is crucial for spotting drips or missed spots.
Step 1: Plan Your Layout and Timeline
This project will take your kitchen out of commission for several days, so plan accordingly. Most cabinet painting projects require 3-4 days when accounting for drying time between coats.
Remove everything from your cabinets and set up a temporary kitchen area with your most essential items. You’ll want easy access to your coffee maker and basic dishes during the project.
Take photos of your cabinet interiors before removing doors. This will help you remember which door goes where when it’s time to reinstall everything.
Step 2: Remove Doors and Hardware
Start by removing all cabinet doors and drawers. Use a drill to speed up the process, and place all screws in labeled bags so you don’t lose track of hardware.
Remove all hinges, knobs, and pulls. If you’re keeping existing hardware, clean it thoroughly with degreasing cleaner. If you’re upgrading hardware, now’s the time to fill old holes with wood filler if the new pieces won’t cover them.
Number each door and its corresponding cabinet box with painter’s tape. This simple step will save you tremendous frustration during reinstallation.
Step 3: Clean Everything Thoroughly
Kitchen cabinets accumulate years of cooking grease and grime that must be completely removed for paint to adhere properly. Use a strong degreasing cleaner like TSP (trisodium phosphate) or a commercial kitchen degreaser.
Pay special attention to areas around the stove and sink where grease buildup is heaviest. Clean both sides of doors and all interior surfaces of cabinet boxes. Allow everything to dry completely before moving to the next step.
Don’t skip this step or try to shortcut it. Poor paint adhesion almost always traces back to inadequate cleaning.
Step 4: Fill Holes and Imperfections
Use high-quality wood filler to repair any dents, scratches, or unwanted holes. If you’re changing hardware that requires different hole spacing, fill the old holes completely.
Apply wood filler with a putty knife, slightly overfilling each defect. Allow to dry according to manufacturer instructions, then sand smooth with 120-grit sandpaper. The goal is a surface that feels perfectly smooth to your hand.
Step 5: Sand All Surfaces
Sanding creates the slightly rough surface that helps paint adhere properly. You don’t need to remove existing finish completely, just scuff it up enough for the new paint to grab.
Start with 120-grit sandpaper to remove any remaining imperfections and create tooth for the paint. Follow with 220-grit for a smooth finish. Sand in the direction of the wood grain on raised panel doors.
Use a tack cloth to remove all sanding dust. Any dust left on the surface will show in your final finish, so be thorough with this step.
Step 6: Prime Everything
Primer is not optional for cabinet painting. It provides adhesion, blocks stains, and creates a uniform base for your topcoat. Use a high-quality bonding primer designed for glossy surfaces.
Apply primer with a brush, working it into all the details and recessed areas. Follow with a foam roller on flat surfaces to achieve a smooth finish. Don’t overload your brush or roller, as this leads to drips and brush marks.
Allow primer to dry completely according to manufacturer instructions. Sand lightly with 220-grit paper between coats if the surface feels rough.
Step 7: Apply the First Paint Coat
Now comes the moment you’ve been waiting for. Apply your first coat of paint using the same brush-then-roll technique you used for primer.
Work in sections, maintaining a wet edge to avoid lap marks. Start with the detailed areas using your angled brush, then roll flat surfaces. Pay attention to corners and edges where paint tends to pool.
Take your time with this coat. Rushing leads to drips, brush marks, and uneven coverage that will show in your final finish.
Step 8: Sand Between Coats
Once your first coat is completely dry, lightly sand with 220-grit paper to smooth any imperfections and create adhesion for the second coat. Focus on any drips or brush marks from the first coat.
Clean thoroughly with a tack cloth before applying the second coat. This light sanding makes an enormous difference in the smoothness of your final finish.
Step 9: Apply the Final Coat
Your second coat should go on more smoothly than the first, as you’re now painting over a uniform surface. Use the same technique, but pay even more attention to achieving an even, consistent finish.
This is your final chance to get everything perfect, so take extra time to inspect your work as you go. Look for drips, missed spots, or brush marks and correct them immediately.
Step 10: Reassemble Your Kitchen
Allow paint to cure for at least 24 hours before handling doors, though full cure takes up to a week. Reinstall hinges first, then hang doors using your numbered system.
Install drawer slides and test the fit of all drawers. Finally, install your cabinet hardware, whether you’re reusing existing pieces or installing new knobs and pulls.
Pro Tips for Success
Temperature and humidity matter. Paint and dry in temperatures between 65-75°F with low humidity for best results. High humidity can cause paint to take much longer to dry and may affect the final finish.
Maintain consistent lighting throughout the project. What looks perfect in dim light may show imperfections in bright daylight. Use portable work lights to supplement natural light.
Don’t rush the drying process. Each coat needs to be fully dry before sanding or applying the next coat. Rushing this step is the fastest way to ruin hours of careful work.
Common Mistakes to Avoid
The biggest mistake DIYers make is inadequate surface preparation. Skipping the cleaning, sanding, or priming steps almost guarantees poor results that won’t last.
Another common error is applying paint too thickly. Multiple thin coats always look better and last longer than fewer thick coats. Thick coats are more likely to drip, sag, or develop an orange peel texture.
Don’t forget about the cabinet boxes. Many people focus all their attention on doors and forget that the visible parts of cabinet boxes also need to be painted for a cohesive look.
Choosing Colors That Work
White remains the most popular choice for painted cabinets, and for good reason. It brightens the space, works with any decor style, and helps small kitchens feel larger.
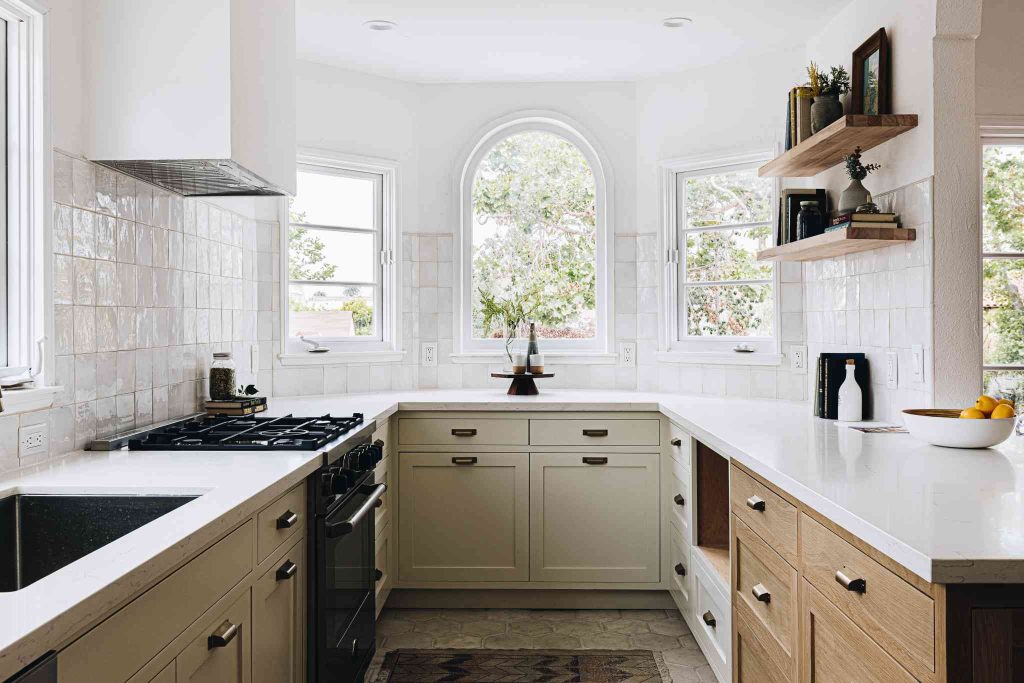
Navy blue has become increasingly popular for a sophisticated look that’s still timeless. Sage green offers a fresh, natural feel that works particularly well in farmhouse or transitional kitchens.
Whatever color you choose, get sample pots and test in different lighting conditions before committing to the full project. Colors can look dramatically different under your kitchen’s specific lighting.

Maintenance and Longevity
Properly painted cabinets should last 5-10 years before needing a refresh, depending on use and care. Clean regularly with mild soap and water, avoiding harsh chemicals that can damage the finish.
Touch up small chips or scratches promptly to prevent moisture from getting under the paint film. Keep some leftover paint for these inevitable touch-ups.
Consider the hardware’s impact on longevity. Soft-close hinges and drawer slides reduce the wear and tear that comes from doors and drawers slamming shut.
When to Call a Professional
While cabinet painting is definitely a DIY-friendly project, some situations call for professional help. If you have a large kitchen with many cabinets, the time investment might make professional painting worth the cost.
Kitchens with intricate millwork or very detailed door styles can be challenging for beginners. Professionals have the experience and equipment to handle complex details efficiently.
If you’re not comfortable with the time commitment or don’t have adequate workspace for the project, professional painters can complete the job faster and with less disruption to your daily routine.
The Transformation Payoff
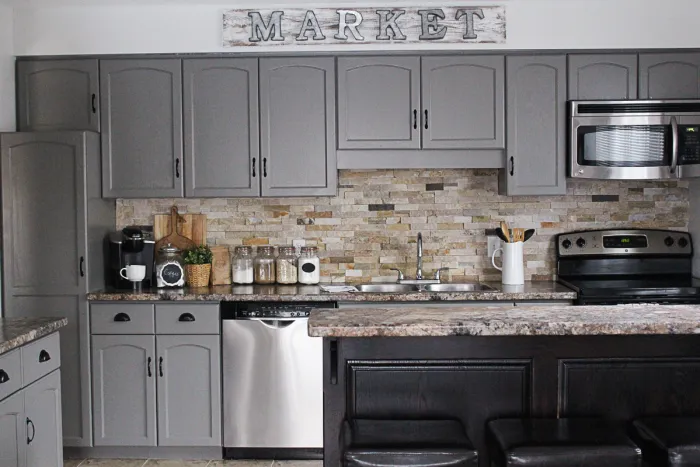
Few home improvement projects offer the dramatic visual impact of painted kitchen cabinets. The transformation from dated wood stain to fresh paint can make your entire kitchen feel new and updated.
Beyond the aesthetic benefits, painted cabinets can significantly increase your home’s value. Kitchen updates consistently rank among the top improvements for return on investment.
Most importantly, you’ll have the satisfaction of knowing you achieved professional-quality results with your own hands. Every time you walk into your kitchen, you’ll be reminded of what you can accomplish with the right approach and a little patience.
The key to success lies in taking your time with each step, especially preparation. While it’s tempting to rush to the fun part of actually applying paint, the hours you spend on proper prep work will pay dividends in the quality and durability of your finished project.