Tired of looking at dull, scratched hardwood floors but dreading the mess and expense of traditional sanding and refinishing? You’re not alone. The good news is that you can breathe new life into your hardwood floors without the dust, noise, and disruption that comes with sanding.
Screen and recoat methods, also known as “buff and coat,” can restore the beauty of your floors in a fraction of the time and cost of full refinishing. This approach works particularly well for floors that are structurally sound but have surface-level wear, minor scratches, and that tired, dull appearance.
When Screen and Recoat Works Best
Not every floor is a candidate for this gentler approach. Screen and recoat works best on floors where the existing finish is still largely intact but showing wear. If you can see the wood grain clearly and the scratches don’t go through to the bare wood, you’re probably a good candidate.
This method is perfect for floors that have lost their shine, have light surface scratches from furniture and foot traffic, or show wear patterns in high-traffic areas. It’s also ideal if your floors were last refinished within the past 10-15 years and you want to extend their life before a full refinishing becomes necessary.
However, if your floors have deep gouges, water damage, or areas where the finish has completely worn away to bare wood, you’ll likely need traditional sanding and refinishing for the best results.
Understanding the Process
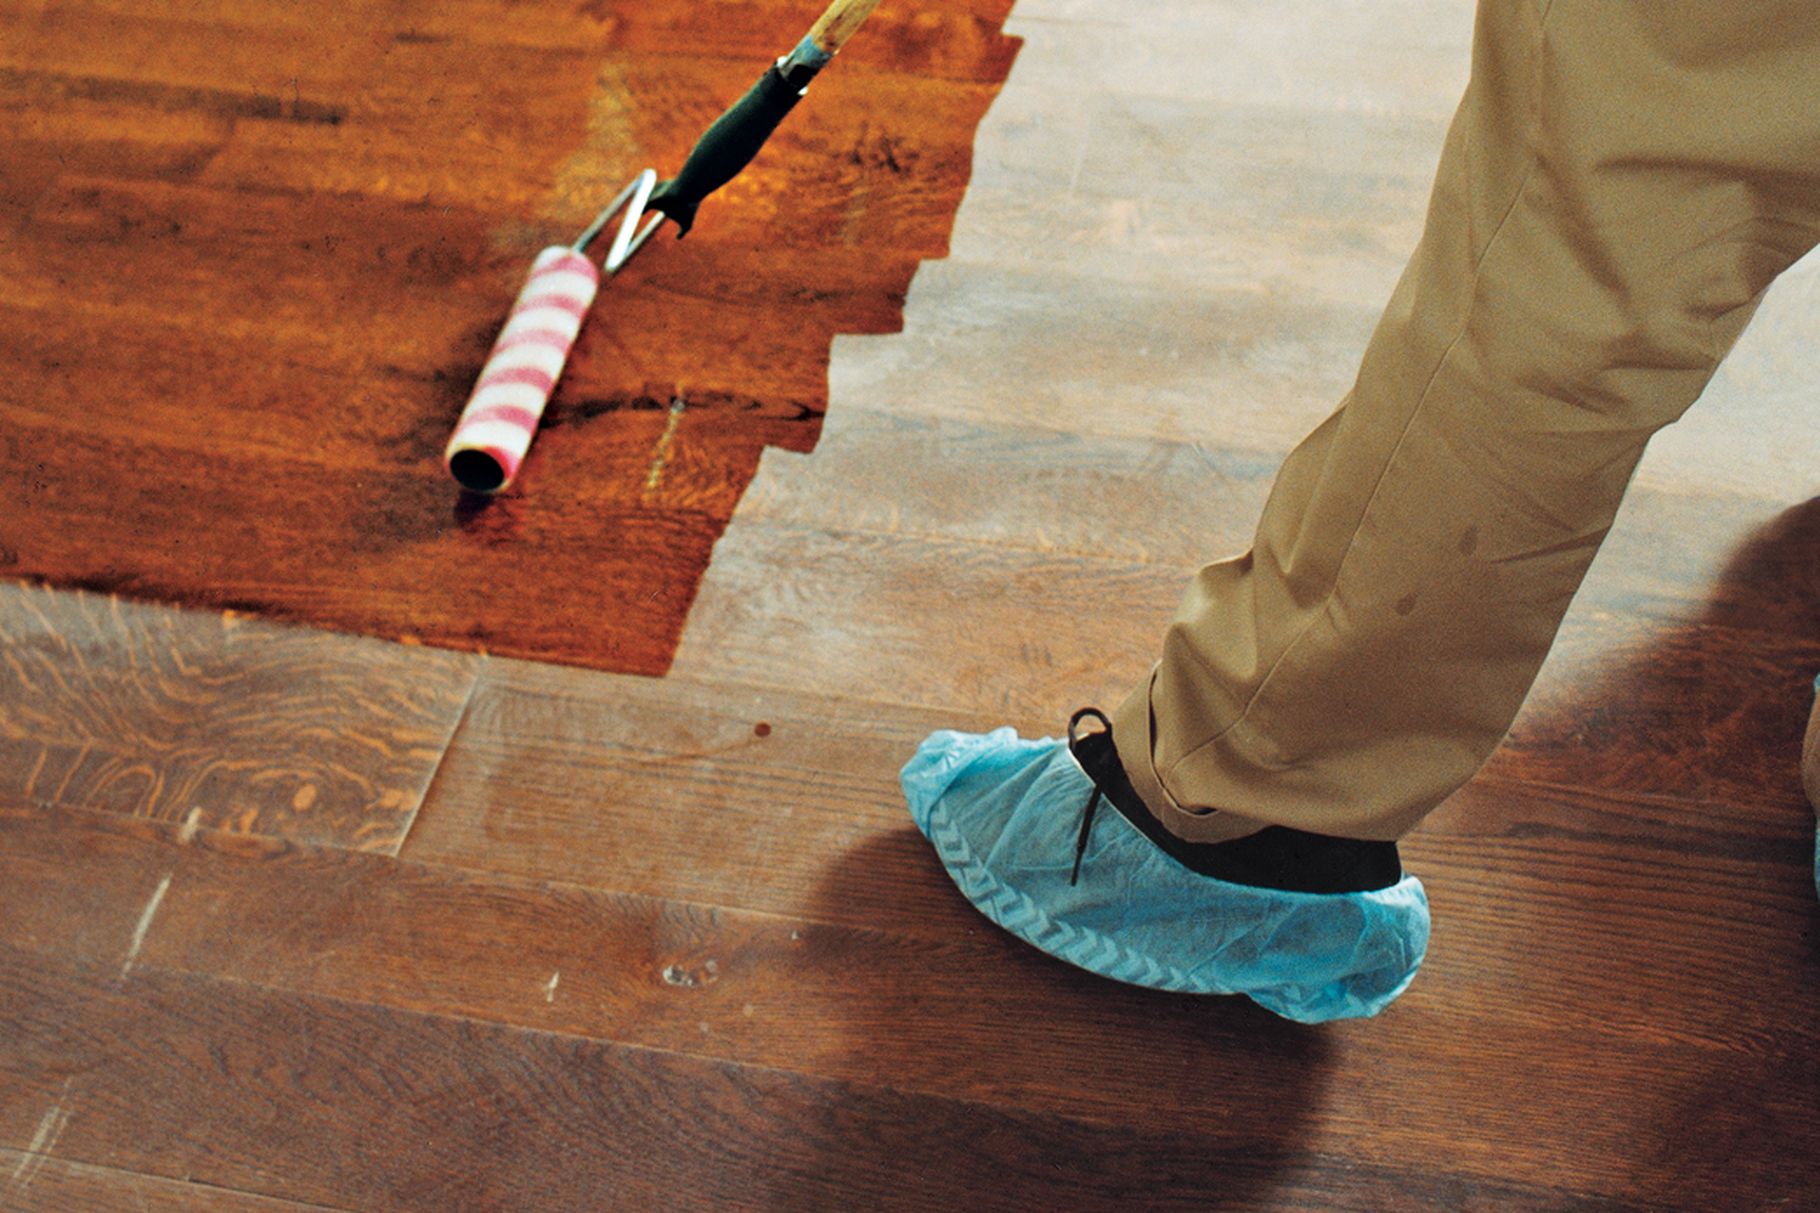
The screen and recoat process involves lightly abrading the existing finish with a buffer and screen, then applying a new coat of polyurethane. This creates a mechanical bond between the old and new finish, resulting in a refreshed surface that can last another 3-5 years.
The screening process removes the top layer of worn finish and creates tiny scratches that help the new finish adhere properly. It’s much gentler than sanding and removes only about 1/1000th of an inch of material compared to the 1/16th inch removed during traditional sanding.
Tools and Materials You’ll Need
Before starting, gather your supplies. You’ll need a floor buffer (which you can rent from most home improvement stores), screening discs in 120-grit, a vacuum cleaner, tack cloths, polyurethane finish, a high-quality applicator or brush, and plastic sheeting to protect adjoining rooms.
Choose your polyurethane carefully. Water-based polyurethanes dry faster and have less odor, but oil-based versions tend to be more durable. Consider the existing finish on your floors when making this choice, as mixing water-based over oil-based (or vice versa) can sometimes cause adhesion problems.
Preparing Your Space
Preparation is crucial for professional results. Remove all furniture from the room and cover doorways with plastic sheeting to contain dust. Even though screening creates much less dust than sanding, you’ll still want to protect adjacent areas.
Clean the floors thoroughly with a hardwood floor cleaner to remove all dirt, wax, and cleaning product residue. Any contaminants left on the surface can prevent proper adhesion of the new finish. Pay special attention to areas around baseboards and in corners where dirt tends to accumulate.
Testing and Spot Repairs
Before committing to the entire floor, test the process in an inconspicuous area. Screen a small section and apply your chosen finish to ensure it adheres properly and gives you the look you want.
Address any minor repairs before screening. Fill small gaps or nail holes with wood filler that matches your floor color. For slightly loose boards, you can often secure them with finish nails driven below the surface and filled.
The Screening Process
Start screening in the corner farthest from your exit and work systematically across the room. Keep the buffer moving constantly to avoid creating swirl marks, and overlap your passes by about half the width of the buffer.
The goal is to create a uniform, slightly abraded surface that will accept the new finish. You’ll know you’re applying the right amount of pressure when you see a consistent, light scratch pattern across the floor. Don’t press too hard or move too slowly, as this can create gouges or burn marks.
Cleaning Between Coats
After screening, vacuum the entire floor thoroughly, paying special attention to edges and corners. Follow up with tack cloths to remove any remaining dust particles. Even tiny dust particles can create bumps and imperfections in your final finish.
Check your work carefully at this stage. The screened surface should have a consistent, slightly rough texture throughout. Any areas that still look glossy or smooth should be screened again before applying finish.
Applying the New Finish
Temperature and humidity matter when applying polyurethane. Ideal conditions are between 65-75°F with relative humidity below 50%. High humidity can cause the finish to dry slowly and develop a cloudy appearance.
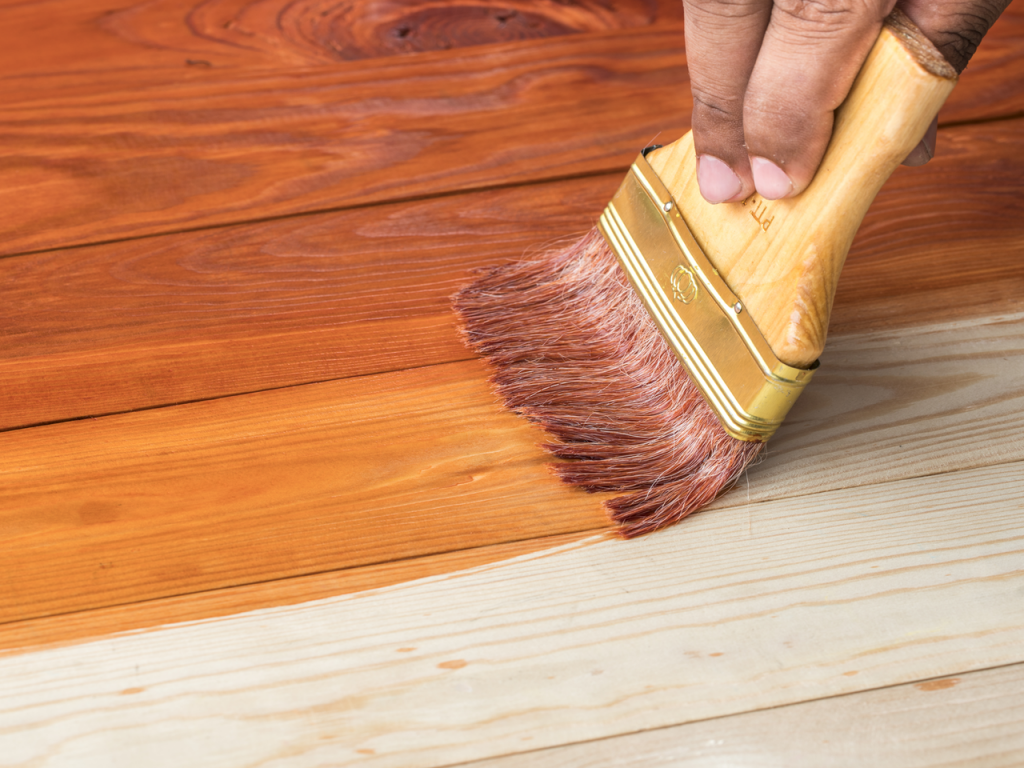
Apply the finish in thin, even coats using long, smooth strokes. Work quickly but don’t rush, maintaining a wet edge to avoid lap marks. Start at the wall opposite your exit and work toward the door so you don’t paint yourself into a corner.
Multiple Coat Application
Most floors benefit from two coats of polyurethane, especially in high-traffic areas. Allow the first coat to dry completely according to manufacturer instructions before applying the second coat.
Lightly screen between coats with fine (220-grit) screening material to ensure good adhesion. This step is crucial for durability and should not be skipped even though it adds time to the project.
Drying and Curing Considerations
Understanding the difference between dry time and cure time is important. The finish may feel dry to the touch in a few hours, but full curing can take several days to weeks depending on the product and environmental conditions.
Plan to stay off the floors as much as possible for at least 24 hours after the final coat. Replace furniture carefully using furniture pads, and avoid area rugs for at least a week to allow proper air circulation during curing.
Maintaining Your Refreshed Floors
Proper maintenance will extend the life of your refreshed finish. Use appropriate hardwood floor cleaners and avoid products containing oils, waxes, or vinegar that can interfere with future refinishing.
Place mats at entrances to trap dirt and grit, use furniture pads to prevent scratches, and maintain consistent humidity levels in your home to prevent the wood from expanding and contracting excessively.
When to Call Professionals
While screen and recoat is very DIY-friendly, some situations call for professional expertise. If you’re dealing with multiple wood species, complex room layouts, or if you’re unsure about compatibility between existing and new finishes, consider hiring a professional.
Professionals also have access to commercial-grade equipment and products that may provide better results than consumer-grade options. They can often complete the job faster and with fewer complications than DIY approaches.
Cost Comparison and Value
Screen and recoat typically costs 20-30% of full refinishing when done professionally, and even less when you do it yourself. The process can be completed in a weekend rather than the week or more required for traditional refinishing.
While the results won’t last as long as full refinishing, screen and recoat can significantly extend the life of your floors and improve your home’s appearance at a fraction of the cost and disruption.
Troubleshooting Common Issues
If your new finish doesn’t adhere properly, it’s usually due to inadequate cleaning or incompatible products. Areas where the finish peels or bubbles will need to be scraped, re-screened, and refinished.
Streaky or uneven appearance often results from applying finish too thickly or not maintaining a wet edge during application. These issues can sometimes be corrected by screening and applying another coat.
Alternative No-Sand Methods
Beyond screen and recoat, other no-sand options include hardwood floor renewal products that chemically etch the existing finish, and professional dustless refinishing systems that use specialized equipment to minimize mess.
Each method has its place depending on your floor’s condition, your budget, and your timeline. Screen and recoat remains the most popular choice for DIYers because it provides excellent results with readily available tools and materials.
Planning Your Project Timeline
A typical screen and recoat project takes 2-3 days from start to finish. Day one involves preparation and screening, day two is for applying finish coats, and day three allows for initial curing before light foot traffic.
Plan the project when you can stay off the floors and when weather conditions are stable. Avoid rainy or humid periods that can interfere with proper drying and curing.
Making the Investment Worthwhile
Screen and recoat is an excellent way to refresh tired hardwood floors without the expense and disruption of full refinishing. When done properly, it can restore much of your floor’s original beauty and provide years of additional service life.
The key to success lies in honest assessment of your floor’s condition, careful preparation, and attention to detail during application. While it requires some effort and planning, most homeowners find the results well worth the investment of time and energy.
With proper execution, your refreshed floors will look dramatically better and provide you with years of enjoyment while you save money for eventual full refinishing down the road.